Thursday 29 May 2014

How to create an app in Facebook with User access token.

Hi Guys,

Lets see how to create an App in Facebook with User access token.

Step 1:
Log in to Facebook as a developer using https://developers.facebook.com.

Step 2:
Click on the app tab and select Create New APP


Enter the display name and Choose the category you wish to Use. Once u complete this click on Create App Button.


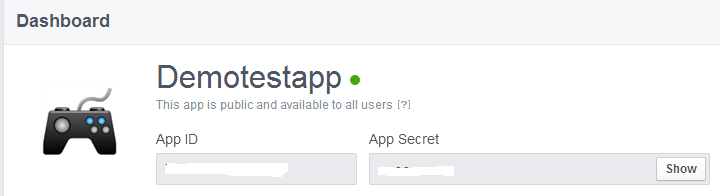
Once your App is successfully Created you will get a APP Id and App Secret. Dont Share your App id and App Secret. App id and App Secret should be used when you go for Social Media Integration or Any other App works.

Step 3:

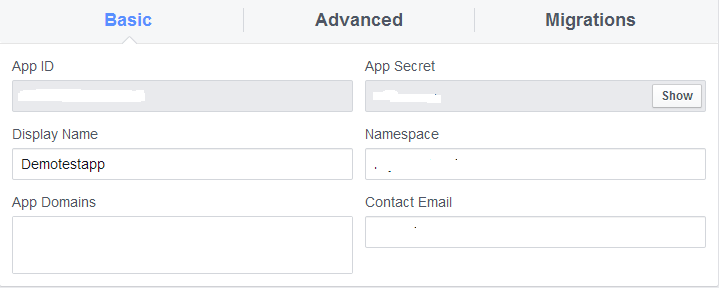
Once you completed this we want to make our app available to public. For this U want to provide E-Mail id in settings.


Select the Settings from left panel and Provide your E-Mail id in Contact E-Mail box. After this Select "Status and Review" from left panel and make the available to public Option as 'Yes'. Now your App is available to public with default permissions.


Step 4:
If you need more permissions go to App Details and Select Configure App Center Permissions
from App Center Listed Platforms and add your Extended permissions you need.


If your app asks for more than than public_profileemail and user_friends it will require review by Facebook before your app can be used by people other than the app's developers.

Step 4:
Adding Platform for your app. Go to Settings and Select Add Platform button. Select the platform you need.


Once you select the platform you want to provide Canvas URL or Website URL. Once you provide all these things your app is now ready with all settings.

Step 5:
Lets see how to create User Access Token for your App. For more information on Access Tokens refer this https://developers.facebook.com/docs/facebook-login/access-tokens/.

From the tools select Graph Explorer, it will take you to Graph API Explorer. Select the Application you want to generate User Access Token. Once you done this Click on Get Access Token, it will ask for the permissions you need select the permissions and click get Access token.


Now you can able to see your User Access Token in Access Token field. If you want to know the App token just click on Get App Token, You can see your App Token in the field.
Once you get the User Access Token click on submit button u can see your User id and name. If you need any additional information U can add extra fields to text field near to get button and You will get the data related to that.


That's All Folks....

Wednesday 14 May 2014

JQX Window loader Example

Today I think to post something related to JQuery

Our Goal
To create a JQX Window using jquery with minimize and maximize options and show the loader inside jqx window when the page loads.

Here is Your Code.
Step 1: 
Add the following JS and css files in your project.

  • jquery-1.10.2.min.js
  • gettheme.js
  • jqxcore.js
  • jqxwindow.js
  • jqxbuttons.js
  • jqx.base.css
http://www.jqwidgets.com/download/    - Download the required files from this link.

Step 2:
Create index.jsp page and add the below code.


<%@ page language="java" contentType="text/html; charset=ISO-8859-1"

    pageEncoding="ISO-8859-1"%>

<!DOCTYPE html PUBLIC "-//W3C//DTD HTML 4.01 Transitional//EN" "http://www.w3.org/TR/html4/loose.dtd">


<html>
<head>
<meta http-equiv="Content-Type" content="text/html; charset=ISO-8859-1">
<title>JQx Window</title>
<link rel="stylesheet" href="css/jqx.base.css" type="text/css" />
<script type="text/javascript" src="js/jquery-1.10.2.min.js"></script>
<script type="text/javascript" src="js/gettheme.js"></script> 
<script type="text/javascript" src="js/jqxcore.js"></script>
<script type="text/javascript" src="js/jqxwindow.js"></script>
<script type="text/javascript" src="js/jqxbuttons.js"></script>

<script>
(function( $ ) { 
        $(function () {
            var theme = getDemoTheme();
      
            $("#jqxwindow").jqxWindow({
                    showCollapseButton: true, height:600, width: 1000, theme:theme, title:'JQX Window', resizable: false , autoOpen: false, zIndex: 0, isModal : true
                    });
      
            $('#openWindow').jqxButton({ theme:theme, width: '80px' }); 
            
            $("#jqxwindow").on("open", function () {
               loadPage('jsp/welcome.jsp'); //Load welcome.jsp inside jqx window
            });
            
            $("#jqxwindow").on("close", function () {
clearPage();
  });
   
            $('#jqxwindow').jqxWindow('focus');
         
            
            var loadPage = function (url) {
                $.get(url, function (data) {
                    $('#content').html(data); //load the page inside content div
                    
                });
            };
            
            var clearPage = function () {
                $('#content').html('<div>' + "<img src='images/loader.gif' style='margin-top: 50px;'>" +" <h4 style='color:gray;''>Loading please wait..</h4>"+ '</div>');
            };
            
            
            $("#openWindow").click(function() {
                $("#jqxwindow").jqxWindow('open'); // open jqx window on button click
                 
           
        });
});
})(jQuery);
</script>
</head>

<body class='default'>
<div align="center">
    <button id="openWindow">Show</button>
 </div>

<div id='jqxwindow'>
        
        <div>
            
                <div id="content">
                    <img src='images/loader.gif' style="margin-top: 50px;"/>
                    <h4 style="color:gray;">Loading please wait..</h4>
                </div>
        </div>
</div>
</body>
</html>


Add the loader.gif file in to your project under WEB-INF/images folder.


Step 3:
Create welcome.jsp file under Webcontent/jsp folder.

<%@ page isErrorPage="true" %>
<%@ page language="java" contentType="text/html; charset=ISO-8859-1"
    pageEncoding="ISO-8859-1"%>
<!DOCTYPE html PUBLIC "-//W3C//DTD HTML 4.01 Transitional//EN" "http://www.w3.org/TR/html4/loose.dtd">
<html>
<head>
<meta http-equiv="Content-Type" content="text/html; charset=ISO-8859-1">
<title>Welcome Page</title>
</head>
<body>
<div align="center" style="margin-top: 200px;">
<h3>Welcome You are done with JQX window Loader.</h3>
</div>
</body>

That's All Folk's


Spring 3 MVC file upload Example

Our Goal

Our goal is to create a File Upload Application in Spring 3 MVC and Hibernate. Following is the functionality.
  1. A form is displayed on main page with fields such as browse button to select document from file system.
  2. User can select any document from local drive and upload the same using Save document functionality.
  3. All the documents saved are added in a database table.
Here is the final screen shot of File Upload Application.


Step 1: Create Database Table

For File Upload application, we will use Oracle database. Create a table documents in a table fileupload. Feel free to extend this example and create a more complex application.

CREATE TABLE "FILEUPLOAD_18796"
  "FILEID" NUMBER(10,0) NOT NULL ENABLE, "MYFILE" BLOB NOT NULL ENABLE
);

Step 2: Add the required jar files under lib folder.

Entity class – The Hibernate model class

Let us start with the coding of File Upload application. First we will create a model object or hibernate POJO class to store document information. Also this class will be an Entity class and will be linked with DOCUMENTS table in database.
public class FileUpload {
long fileid;
private Blob myfile;
private MultipartFile file;
private String message;
public FileUpload() //Default constructor for spring bean configuration.
{

}
// Add getters and setters.
}
The Hibernate Util Class

public class HibernateUtil {
    SessionFactory sessionfactory;
    public HibernateUtil()
    {
         //CreatingSessionfactory
    sessionfactory=new Configuration().configure().buildSessionFactory();
    }
    public SessionFactory getSessionFactory()
    {
return sessionfactory;
   
    }
}
The Data Access (DAO) Layer

package in.fileupload;
import java.util.ArrayList;
import in.fileupload.HibernateUtil;
import org.hibernate.HibernateException;
import org.hibernate.Session;
import org.hibernate.SessionFactory;
import org.hibernate.Transaction;
public class FileUploadDao {
private FileUpload fu;
public FileUpload getFu() {
return fu;
}
public void setFu(FileUpload fu) {
this.fu = fu;
}
public void saveBlobFile(FileUpload fileupload)
{
Session session=null;
HibernateUtil util=new HibernateUtil();
Transaction transaction=null;
try{
SessionFactory sessionfactory=util.getSessionFactory();
session=sessionfactory.openSession();
transaction=session.beginTransaction();
session.save(fileupload);
transaction.commit();
System.out.println("File Uploaded Successfully");
}catch(HibernateException ex)
{
transaction.rollback();
System.out.println("******Hibernate Exep " +ex.getMessage());
ex.printStackTrace();
}catch(Exception ex)
{
transaction.rollback();
System.out.println("******Exception " +ex.getMessage());
ex.printStackTrace();
}finally
{
try
{
session.flush();
session.close();
System.out.println("session closed");
}catch (HibernateException ex) {
// TODO: handle exception
System.out.println("******HibernateException " +ex.getMessage());
ex.printStackTrace();
}
}
}
}

The Controller Class


public class FileUploadController extends MultiActionController {

private FileUploadDao fileupdao;
public FileUploadDao getFileupdao() {
return fileupdao;
}
public void setFileupdao(FileUploadDao fileupdao) {
this.fileupdao = fileupdao;
}
public ModelAndView saveBlob(HttpServletRequest request, HttpServletResponse response, @ModelAttribute("fileUploadForm") FileUpload fileUploadForm) throws Exception
{

MultipartFile file = fileUploadForm.getFile();
System.out.println("Save Method Called");
try{
Blob blob = Hibernate.createBlob(file.getInputStream());
fileUploadForm.setMyfile(blob);
fileupdao.saveBlobFile(fileUploadForm);


System.out.println("<<<<< File Data Updated Successfully >>>>>");
fileUploadForm.setMessage(file.getOriginalFilename());

}catch(Exception e)
{
e.printStackTrace();
}
return new ModelAndView("success","fileUploadForm",fileUploadForm);
}

public ModelAndView redirect(HttpServletRequest request,
HttpServletResponse response) throws Exception {
return new ModelAndView("upload", "", "");
}

Adding Spring MVC Support to Webapplication

Let us add Spring MVC support to our web application.
Update the web.xml file and add servlet mapping for org.springframework.web.servlet.DispatcherServlet. Also note that we have mapped url / with dispatcherServlet so all the request are handled by spring.
File: /src/webapp/WEB-INF/web.xml
<?xml version="1.0" encoding="UTF-8"?>
<web-app xmlns:xsi="http://www.w3.org/2001/XMLSchema-instance" xmlns="http://java.sun.com/xml/ns/javaee" xsi:schemaLocation="http://java.sun.com/xml/ns/javaee http://java.sun.com/xml/ns/javaee/web-app_2_5.xsd" id="WebApp_ID" version="2.5">
  <display-name>SpringFileUpload</display-name>
  <welcome-file-list>
    <welcome-file>upload.jsp</welcome-file>
  </welcome-file-list>
  <servlet>
        <servlet-name>dispatcher</servlet-name>
        <servlet-class>org.springframework.web.servlet.DispatcherServlet</servlet-class>
        <load-on-startup>1</load-on-startup>
    </servlet>
    <servlet-mapping>
        <servlet-name>dispatcher</servlet-name>
        <url-pattern>*.htm</url-pattern>
    </servlet-mapping>
  <context-param>
        <param-name>contextConfigLocation</param-name>
        <param-value>/WEB-INF/dispatcher-servlet.xml</param-value>
    </context-param>
  <listener>
    <listener-class>org.springframework.web.context.ContextLoaderListener</listener-class>
</listener>
</web-app>
File: /src/main/webapp/WEB-INF/dispatcher-servlet.xml

<?xml version="1.0" encoding="UTF-8"?>
<beans xmlns="http://www.springframework.org/schema/beans"
xmlns:xsi="http://www.w3.org/2001/XMLSchema-instance"
xmlns:p="http://www.springframework.org/schema/p"
xsi:schemaLocation="http://www.springframework.org/schema/beans http://www.springframework.org/schema/beans/spring-beans.xsd">

<bean class="org.springframework.web.servlet.mvc.support.ControllerClassNameHandlerMapping" />
  
<bean id="viewResolver"
          class="org.springframework.web.servlet.view.InternalResourceViewResolver" p:prefix="/WEB-INF/jsp/" p:suffix=".jsp">
          </bean>
          
    <bean id="multipartResolver" class="org.springframework.web.multipart.commons.CommonsMultipartResolver">
</bean>

<bean name="/fileupload/*.htm"  class="in.fileupload.FileUploadController">
<property name="fileupdao" ref="fileupdao"></property>
</bean>
<bean name="fu" class="in.fileupload.FileUpload"></bean>

<bean name="fileread" class="in.fileupload.FileRead">
<property name="fileupdao" ref="fileupdao"></property>
</bean>

<bean id="dataSource" class="org.springframework.jdbc.datasource.DriverManagerDataSource">
<property name="driverClassName"  value="oracle.jdbc.driver.OracleDriver"></property>
<property name="url" value="jdbc:oracle:thin:@oraapps-test.india.rapidigm.com:1532/FCPR12"></property>
<property name="username" value="oratrain1"></property>
<property name="password" value="oratrain1"></property>
</bean>

<bean id="mysessionFactory" class="org.springframework.orm.hibernate3.LocalSessionFactoryBean">
<property name="dataSource" ref="dataSource"></property>
</bean>

<bean id="d" class="in.fileupload.HibernateUtil">
</bean>
<bean id="fileupdao" class="in.fileupload.FileUploadDao">
<property name="fu" ref="fu"></property>
</bean>

</beans>

Adding Hibernete Support to Webapplication

src/hibernate.cfg.xml

<?xml version="1.0" encoding="UTF-8"?>
<!DOCTYPE hibernate-configuration PUBLIC "-//Hibernate/Hibernate Configuration DTD//EN"
             "http://hibernate.sourceforge.net/hibernate-configuration-3.0.dtd">
<hibernate-configuration>
 <session-factory name="">
  <property name="hibernate.connection.driver_class">oracle.jdbc.driver.OracleDriver</property>
  <property name="hibernate.connection.url">"Your Connection URL"</property>
  <property name="hibernate.connection.username">"Un for db"</property>
  <property name="hibernate.connection.password">"PW for db"</property>
  <property name="hibernate.connection.pool_size">10</property>
  <property name="show_sql">true</property>
  <property name="dialect">org.hibernate.dialect.OracleDialect</property>
  <property name="hibernate.hbm2ddl.auto">update</property>
  <mapping resource="Employee.hbm.xml"/>
 </session-factory>
</hibernate-configuration>

src/Employee.hbm.xml

<?xml version="1.0"?>
<!DOCTYPE hibernate-mapping PUBLIC "-//Hibernate/Hibernate Mapping DTD 3.0//EN"
                                   "http://hibernate.sourceforge.net/hibernate-mapping-3.0.dtd">
<!-- Generated 29 May, 2013 2:01:36 PM by Hibernate Tools 3.4.0.CR1 -->
<hibernate-mapping>
 <class name="in.fileupload.FileUpload" table="fileupload">
  <id name="fileid" type="long">
   <column name="fileid"/>
   <generator class="increment"/>
  </id>
  <property name="myfile" type="blob">
   <column name="myfile"/>
  </property>
 </class>

</hibernate-mapping>

Finally add following index.jsp file to Web Content.


<%@ page language="java" contentType="text/html; charset=ISO-8859-1"
    pageEncoding="ISO-8859-1"%>
    <%@ taglib prefix="form" uri="http://www.springframework.org/tags/form"%>
<!DOCTYPE html PUBLIC "-//W3C//DTD HTML 4.01 Transitional//EN" "http://www.w3.org/TR/html4/loose.dtd">
<html>
<head>
<meta http-equiv="Content-Type" content="text/html; charset=ISO-8859-1">
<title>File Upload Example</title>
</head>
<body>
<div>
<form:form method="post" name="UploadForm" action="fileupload/saveBlob.htm" enctype="multipart/form-data" commandName="fileUploadForm" onsubmit="return checkUploadForm()">
<center>Please select a file to upload : <hr>
<input type="file" name="file" id="file"/>&nbsp;&nbsp;
<input type="submit" value="upload" id="select"/>
</center>
</form:form></div>

</body>

</html>
Success.jsp file to WEB-INF/jsp folder.


<%@ page language="java" contentType="text/html; charset=ISO-8859-1" pageEncoding="ISO-8859-1"%> <!DOCTYPE html PUBLIC "-//W3C//DTD HTML 4.01 Transitional//EN" "http://www.w3.org/TR/html4/loose.dtd"> <html> <head> <meta http-equiv="Content-Type" content="text/html; charset=ISO-8859-1"> <title>Success Page</title> </head> <body> <center><h3>Your File <font color="blue">${fileUploadForm.message}</font> Has Been Uploaded Successfully</h3> <a href="redirect.htm"><font color="black">Home</font></a></center> </body>
</html>

That’s All folks